Popular Posts
-
 Azolla is one of the waterborne blue green algae or fern which is mainly used as organic fertilizer in rice field in many part of world. Az...
 -
 SRI System of Rice Intensification My journey of experiments with nature started seriously 2 years back, Due to my childhood aquantice with ...
 -
Vermicomposting is the biological degradation and stabilization of organic waste by earthworms and microorganisms to form vermicompost. This...
-
 Today, I am very excited to write about my last weekend adventure of setting up my own first drip irrigation system. First things first, abo...
 -
 Every time, in my farm i meet visiting farmers. Often they ask how much i spend on fertilizers. usual rural mis conception is better the spe...
 -
Hi All, Happy Ugadi !! My latest found fascination is Hydroponics cultivation, Hence would like to dedicate this post to explain the fundame...
-
Today to check my soil condition and to see how my soil is doing after 2 years of operations, went to GKVK agriculture university in Bangalo...

Sunday, April 17, 2011
Sunday, April 3, 2011
My Experiment with Hydroponics - Part 1
Hi All,
Happy Ugadi !!
My latest found fascination is Hydroponics cultivation, Hence would like to dedicate this post to explain the fundamentals of it, the way i understand.
What is Hydroponics Cultivation?
Simple Answer is Soil less cultivation.
Hydroponics as defined in Wikipedia
"Hydroponics (From the Greek hydro, water, and ponics, labour) is a method of growing plants using mineral nutrient solutions, in water, without soil. Terrestrial plants may be grown with their roots in the mineral nutrient solution only or in an inert medium, such as perlite, gravel, mineral wool, or coconut husk."
The whole idea behind hydroponics is to ensure soil borne diseases effecting the plant growth is eliminated. understanding the Nutrient and other environmental conditional requirements, and supplying them regularly, enables maximum yield to one's genetic potential.
In the process, By striking off the unknown entities (Soil Borne Diseases) and ensuring conditional requirements like Nutrients Strength, PH, Moisture Level, Root Zone Temperatures, Electrical Conductivity are met. We bring in lot of certainty to the whole cultivation.
Although traces of the known History of Hydroponics goes back to 16th Century or probably even before that, still the road is so less traveled, Since it leaves lot of scope to improvise/ innovate.
There are lot of critics around this form of cultivation, as to say chemical based cultivation, Organic /Inorganic, technology awareness to the farmer, cost of infrastructure, local consultancy or neighborhood awareness etc.
I will leave all those debatable stuff for the people to debate, I liked the fact that the process brings in lot of certainty to cultivation, bringing in more defined parameters to control for profits.
From the consumer point of view, Since hydroponics is practiced in a controlled environment, pests and general infestation is restricted to the Max. in turn this eliminates harmful pesticide application on the fruits and vegetables we consume.
Due to the supply of all the necessary nutrients to the plants, fruits or vegetables will be of better nutrient values in compliance with its genetics. this also increases shelf life :)
So i see it as Win Win for both Farmer and Consumer.
There are different practices within Hydroponics like Deep Water Channel system, Nutrient Film Technique, Flow and Drip etc.
In all the techniques, what's important to understand is to know what is holding the plant and the roots (Substrate), How NS is supplied to it, and at the same time how other conditional parameters are managed.
To make it simple, for my first experiment i choose to grow Tomato & Capsicum with the Coco pet as substrate. intention is the regularly irrigate the plants with the NS and collect back the runoff for recirculation.
I will explain the setup in the next part.
Thanks,
Suraj
Sunday, February 13, 2011
My First Drip Irrigation Experiment
Today, I am very excited to write about my last weekend adventure of setting up my own first drip irrigation system.
First things first, about the material sourcing. I got all my drip parts purchased from Metro Drip Irrigation (P) Ltd, Bangalore. the shop is on SJP road very well known. Hence if you are lost there other traders on the road should be able to guide you.
I took 12mm 300 mtr inland drip pipe, drill (to drill the PVC pipe with proper round slots), PVC joint set (its a straight connector with the rubber wiser), Pearcer to make drip holes, end caps, elbows, straight connectors etc. all in the range of 10 each. also i took micro tube of 100 mtr length which i didnt use.
Second making of it. Our source of water is the 4000 Ltrs overhead water tank. Its mainly to supply water to the animal sheds for feeding. since we had one existing outlet for comman chores we thought of splitting it and making it our source point for main line.
then to control the pressure we put a ball valve.
 |
| From Drip Irrigation Experiment |
 |
| From Drip Irrigation Experiment |
Initally we tried a straight zig zag layout to all the rows without a main line, it ended up serving only 2 rows :). Then we shifted to the current design of a main line 1" pvc pipe with ball valve as pressure regulator and then branch lines serving each row with 12mm drip lateral.
once the pipe was lay'd and pressure tested, next we had to punch the drip pipe for the outflow, that was also quite a learning initially we punctured it randomly. Then when we tested, we saw it had become a nice sprinkler system rather than a drip irrigation :) so realizing the mistake we did small holes along the line marked on the drip line and made it face ground wards. this was effective and with the control of pressure valve, were able to control the flow LPH (Liter per Hour).
Final look at the finished work was great, I am sure plants must be happy with this.

In total i spent around 1800 Rs for all, However there is enough material behind to make another small garden.
Saturday, February 5, 2011
Soil Testing Ordeal
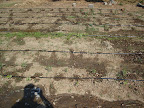
Today to check my soil condition and to see how my soil is doing after 2 years of operations, went to GKVK agriculture university in Bangalore.
To my disbelief i was told that, to get soil test done just the primary nutrient analysis its 500/- and to get entire analysis that is primary, secondary and micro nutrients it will cost 2000/- Rupees. its almost to 45$!! :)
Over and above, to top it, will take 15-20 days for the analysis report to reach you, I said let me pay through cash then they say, you can only pay through demand draft. Come on where will i find a bank to get a draft there, Happened to discover Canara bank in the campus luckily. it was so full, not been to the bank for a long time now, probably 3 years. still seeing the wooden counters with people lined in queue for transaction was nostalgic. but sticking to the topic. Finally i decided due to the cost and the delay for the tests will not get this done, else will get a self do kit.
with the whole experience of today, there are couple of questions to me.
We all know getting soil test is elementary, and by doing you will know what to supplement to get the optimum yield. So an average Indian farmer with an annual income of not more than 25 - 35K (thousand rupees) can he spend almost 1/10th of the income on the soil test?
When we get for 20-25$ do it yourself kits which can test around 20 samples for the primary nutrients in US, why is this test so costly and non affordable to the Indian farmers? is it just exploitation of there ignorance?
Why cant government provide this facility reachable to every farmer at a reasonable subsidized cost?
Leave the government, fertilizer industry in India is a multi million dollar business. Why cant these companies provide this basic facility to farmer and educate him on the next crop application. to me it makes more sense as i would see it as marketing campaign. why not? is the market taken for granted.
without the basic infrastructure to the farmer, Agri science graduates/ scientists, if you are going to farmer and do your thesis oral recitation to him on the effectiveness of fertilizer's etc...blah blah, have you ever thought does it make sense to him ;)
Tuesday, January 25, 2011
VermiCompost
Vermicomposting is the biological degradation and
stabilization of organic waste by earthworms and microorganisms
to form vermicompost. This is an essential part in organic
farming today. It can be easily prepared, has excellent
properties, and is harmless to plants. The earthworms
fragment the organic waste substrates, stimulate microbial
activity greatly and increase rates of mineralization.
These rapidly convert the waste into humus-like substances
with finer structure than thermophilic composts but possessing
a greater and more diverse micro-bial activity.
Vermicompost being a stable fine granular organic matter,
when added to clay soil loosens the soil and improves the
passage for the entry of air. The mucus associated with
the cast being hydroscopic absorbs water and prevents
water logging and improves water-holding capacity. The
organic carbon in vermicompost releases the nutrients
slowly and steadily into the system and enables the plant
to absorb these nutrients. The soil enriched with vermincompost
provides additional substances that are not
found in chemical fertilizers.
Many agricultural industries use compost, cattle dung
and other animal excreta to grow plants. In today’s
society, we are faced with the dilemma of getting rid of
waste from our industries, household etc. In order for us
to practice effective waste management we can utilize
the technology of vermicomposting to effectively manage
our waste. This process allows us to compost the
degradable materials and at the same time utilize the
products obtained after composting to enhance crop
production.
Standard VermiCompost Nutrient Parameters
pH 6.12 ± 0.03
Total salts (ppm) 3148.67 ± 48.58
Total Nitrogen (%) 1.11 ± 0.05
Organic carbon (%) 9.77 ± 5.05
C/N ratio 8.80
Available phosphate (ppm) 597.67 ± 0.58
Calcium (ppm) 322.33 ± 24.91
Magnesium (ppm) 137.33 ± 19.50
Potassium (ppm) 2428.33 ± 326.28
Manganese (ppm) 0.69 ± 0.01
Iron (ppm) 0.11 ± 0.01
Copper (ppm) 0.01 ± 00
Saturday, January 22, 2011
Soil Fertility

Every time, in my farm i meet visiting farmers. Often they ask how much i spend on fertilizers. usual rural mis conception is better the spending better will be the yields. Fertilizer they mean chemical fertilizer like Urea, DAP and Complex....Etc. I always say i dont know much about them and i use it only on some wise neighboring wisdom or on recommendation by Agri geeks.
Over the days i am been enquiste to understand what are these and how do they impact on the ecology. What i understand with my little nature experimentation is nature is well equipped to sustain itself, what it needs from us is to work with it not against it.
To give you an example gravity is nature we all know if we throw the ball up it will come down thats nature, working to keep it afloat, i would say against the nature.
Although as science students we always challenge the nature and take credit when we are able to achieve against the nature laws. Don't mistake me, I am perfectly fine with the design of aeroplanes, helicopters, rockets etc. they are all exploiting the laws of the nature for good, but there is a limit to it, crossing the limit is violation of nature which will effect adversely. Even Newton has proved in his 3rd law of motion "Every action has an equal and opposite reaction". we all know whats the adverse effect of flying machines on our ozone layer !!
Well scientific research and benefits of it to the mankind is a endless list and a good topic for debate.
Talking about cultivation, what is the science in it?? its purely nature.
Nature sets the season, seed is germinated, plant grows, flowers, pollination happens, fruits set, they ripen, seeds are back set to the ground at a right time to complete the cycle.
Tell me what is science in it, its purely nature. Science can help us study the nature and define laws to help it rather than replace it.
Mother nature biggest gift to us all is Soil, What is Soil?
Soil is natural body consisting of layers of mineral constituents of variable thickness.
Soil particles pack loosely, forming a soil structure filled with pore spaces. These pores contain soil solution (liquid) and air (gas). Accordingly, soils are often treated as a three state system. Soil is also known as earth: it is the substance from which our planet takes its name.
Soil is the fundamental base on which we all stand same is with plants, Plants base them selves in soil and grows from it. they spread there roots in it and harness the mineral base, solution and gas pockets to grow.
so then what is the differentiating factor for the growth of plants under ideal environmental circumstances. its the soil fertility. apart from the air, water, proper sunlight what can differentiate the growth of plants is Soil strength or Soil fertility!!
Hence lets see with the nature how Soil fertility is defined and how we can work to improve it.
Soil fertility is dependent on 2 other parameters Soil Nutrients, and Soil structure.
Soil Nutrients : As defined earlier Soil is made up of layers of mineral constituents, Plant will need Micro and Macro nutritive base in the soil to grow and flourish. Macro nutrients are commonly known as NPK. Nitrogen, Potash and Potassium. balanced ratio of these nutrients are important apart from these, soil should contain sufficient minerals (trace elements) for plant nutrition, including boron, chlorine, cobalt, copper, iron, manganese, magnesium, molybdenum, sulfur, and zinc. Over above all there are set of micro organisms work on the soil organic matter fixing back many of the nutrient base used by vegetation. Vegetative growth above the soil and below the soil is self balancing. Any nutrient deficiency can be met by adding more bio degradable organic waste to the soil, in turn help the micro organisms to grow to improve the fertility.
Takeaway: Add more organic bio degradable mass to the soil to help with the fertility, where there is acute shortage some amounts of nutrients may have to be supplemented for a brief duration, science can help with the quantity of supplementation by doing a simple soil tests.
No No: without understanding the soil nutrient deficiency, just feeding the macro nutrients can be adverse and reduce the micro organism population reducing the land to go barren.
Soil Structure: is the arrangement of soil particles into aggregates. These may have various shapes, sizes and degrees of development or expression. Soil structure affects aeration, water movement, resistance to erosion and plant root growth. Structure often gives clues to texture, organic matter content, biological activity, past soil evolution, human use, and chemical and mineralogical conditions under which the soil formed.
make the soil porus to allow air to pass through and help with water retention, this can be achieved by natural tilling, substituting the tractor tilling. Encourage organisms to grow who will supplement the work of tractor, encourage organisms like ants, earthworms who are natural soil tillers, By increasing the bio degradable content within the soil it also increases these organisms who feed on them and in turn help you with improving the Soil structure.
Takeaway: Encourage organic manuring to attract natural soil tillers who will work effortlessly to improve the soil structure of your land.
No No: use of chemical treatments and pesticides may kill the organisms establishment and may take years to regroup and work.
To summaries my blog i would say to increase your yields work on your Soil fertility, provide enough organic degradable bio mass, supplement with the best available options for the deficiencies and help in increasing non demanding organisms, micro organisms labour force to your advantage:)
Happy Farming, Happy Experimenting.
-Suraj
Friday, January 21, 2011
Azolla the Super -Plant


Azolla is one of the waterborne blue green algae or fern which is mainly used as organic fertilizer in rice field in many part of world. Azolla floats on the surface of water by means of numerous, small, closely-overlapping scale-like leaves, with their roots hanging in the water. They form a symbiotic relationship with the cyan bacterium Anabaena azollae, which fixes atmospheric nitrogen, giving the plant access to the essential nutrient. This has led to the plant being dubbed a "super-plant", as it can readily colonize areas of freshwater, and grow at great speed - doubling its biomass every two to three days.
Azolla leaves have small vacuum in upper part which consist of Blue green algae called as “ANABINA AZOLLY” which fixes nitrogen from surrounding environment. There is symbiosis between Azolla & blue green algae in which nitrogen required for Azolla provided by blue green algae & algae requires some essential nutrients from Azolla. As far as use of Azolla for milch animal is concerned, now a day’s, there is much attention on the aspect of animal nutrition and Azolla. Azolla has abundant amount of proteins & vitamins.
Azolla consist 25 to 35% proteins as well as Ferrous, Copper, Magnesium in good proportion than that of ordinary fodder grasses, if we use Azolla in feed of milch animals then milk production will increase.
It has also high palatability making it a boon to the dairy farmers, Azolla with its high protein content has good potential to replace the proportions of concentrate feed used as part of daily diet of dairy animals.
As part of pilot experiments it is also observed that by feeding 1 kg of Azolla there is jump of 1-2 liters of milk yield per cow.
Translating the same economically to the farmer, per serving he can save on the concentrate feed and get more milk with more returns?
Daily feeding Azolla increases the protein content of the milk and will provide better nutrition to the cattle.
How to grow it:
Choose a shady place; prepare a pit of 10x10 ft with 20 inches depth, clean the edges and base of the pit should be kept level. Put the plastic paper over the pit to stretch to the bottom sides so that it forms a structure of water holding tank. Elevate the edges using mud or bricks so to prevent from flooding. Secure the sides of the plastics with hard stones or heavy materials. Pore water in the tank to the brim and mix it with 5 kgs of fertile mud.
Prepare dung mixture with 5 kg cow dung, 30 gm super phosphate with 20 liters of water.
Introduce the dung mixture into the pond and stir well so that the contents are thoroughly mixed. Add 1- 2 kg of pure Azolla culture (Can be borrowed by neighboring farmers or from local agriculture colleges).
Frogs can spoil the harvest by eating the roots of Azolla; hence cover the pit with a net so that frogs can’t enter.
Within 20-25 days Azolla will cover the entire pond with thick growth, from then you can harvest 1 kg of Azolla each day preferable starting with the corners.
Every 10 days introduce the dung mixture and maintain the water levels in the pond.
Sunday, January 16, 2011
My Experiment with SRI

SRI System of Rice Intensification
My journey of experiments with nature started seriously 2 years back, Due to my childhood aquantice with paddy cultivation, used to be curious to understand global processes and methodologies around this cultivation to do better and to help my local community benefit.
Rice being staple diet for majority of Asia, its importance is well engraved in every culture, every custom of rural India. Needless to say the importance of Rice in providing food security to millions, underlining the importance on the economic front still Indian Finance minister prays for good rains to control inflation every year. With the ever increase in population demand is always on the rise, where as the supply is stunted in growth due to lots of challenges like non availability of Labour due to urban migration, high input cultivation costs (Chemical fertilizers, Seeds, Pesticides), year on year decreasing yield levels etc.
I don’t really know how others perceive this but I would see this as an alarming state, certain and immediate danger which needs to be addressed on urgent basis. The need of the hour is to improve the cultivation methodology, increase the yields with no additional costs, help restore the faith of farmer in agriculture.
I as a weekend farmer dedicate my weekends in this initiative and sincerely believe in contributing back to society. In my present Endeavour, embarked on this journey to find better rice cultivation practice which can be adopted to address these current challenges. One day browsing through the internet stumbled upon the research findings of an international NGO on rice cultivation called SRI (System of Rice Intensification) claiming to increase the rice yields from 30-300 %. Initially I was skeptical on the information, but more and more I read about it from other sources and thought over it, more logical I felt and convinced I became on its principles. The best part of the methodology is, it is flexible to implementation based on the local conditions. So it doesn’t say follow the recipe and will get these results, it says follow the principles for better results. According to me SRI recommend guiding principles for cultivation methodology, which can be adapted to many crops with implementation process variations.
SRI Fundamental Principles
1. Utilize early vigor of young seedlings.
Optimum care and nutrition has to be provided at the early start. it goes with a Kannada wise old saying says "Belayuva siri yanu, molake yelle nodabohudu" translation says harvest can be seen in the germinated seed. As initial post germination phase of few days are important for the plant to establish itself, maximum nutrition or care should be given. Hence implement better nursery techniques to grow healthy seedlings and plant them in the fields in the early stage. That is between 8-12 days in nursery.
2. Reduce competition from light and nutrients.
Give adequate spacing between the plants to allow healthy growth. Have a minimum spacing of 25 cms x 25 cms between the plants.
3. Leave them alone, Reduce external inputs.
Allow the plant to establish itself and grow to its potential naturally, Help them when it is needed only. Restrict the unnecessary application of chemical fertilizer and pesticides.
Only weeding has to be done regularly.
4. Keep soil from becoming anoxic (without oxygen).
Do not flood the fields and pool the water, its totally a misconception among farmers that paddy are aquatic plants, in fact they are resistant to flooding or water logging. but they dont prefer it. By water logging air doesn't reach the roots and it can decay decreasing the output. Drain the fields only water once in a week allow the air to penetrate the soil. This will greatly help in term s of reducing your fertilization cost.
5. Promote Healthy root growth.
By regular weeding on the fields with the mechanical weeders (spiked rollers) they will uproot the unwanted weeds in between the plants and also will aerate the soil for better root propagation. This has to be done every 15 days.
6. Increase soil microbial activity by enhancing Soil Organic matter.
Use plenty of organic material to fertilize your soil, they in turn will promote the growth of microbial activity and in turn help you with breaking down the constituents of the air into growth promoters.
Pictorial Representation of the SRI Principles

Probably after reading through the principles you must have thought it to be more of common sense, probably you might have already realized this in your kitchen garden or in your balcony flower pots. Yes!! SRI fundamental principles are more like common sense; probably our previous generations adopted this and with time, lost the technique?
Anyways I am glad we are able to rediscover the technique, To prove the point, I planned to experiment on my farm last monsoon, after much persuasion got a land of 15 guntas to try this out and documenting my observations and results here.
Observations:
- Care to be taken while transplanting as seedlings are very young, root damages has to be minimized to reduce establishment time. Use of mechanical transplantors can be very beneficial.
- Working with the manual weeder can be quite an effort to cover an acre; person has to walk with the weeder in the paddy field for approximately 15-17 Kms!!. Use of power weeders can help to a certain extent.
- For the initial period, Be prepared for pest control with any organic solutions before in hand to ensure no loss of productivity. Use of native seeds may help prevent from certain pests and do regular crop rotations to break the pest life cycle.
- Be prepared for an early harvest of at least 10 days. Grain maturity will be early comparatively.
- Crops will be very receptive to Vermin wash regular foliar sprays; this will enable constant supply of micro nutrients to the plants.

Results:
| Cultivation Method | No of Tillers per Hill | No of productive Tillers per Hill | Average Grains per Pinnacle | Yield per Gunta | Yield per Acre |
| Conventional | 20-25 | 60-70% | 100-125 | 32 Kgs | 1280 Kgs |
| SRI | 50-75 | 70-90% | 210-225 | 56 Kgs | 2240 Kgs |
175% higher yield in SRI was observed, still felt if we had done another round of weeding and enough organic soil fertilization was adequately done during land preparation stage then easily we could have reached 80Kgs per Gunta, anyways there is always something to improvise for the next season.
On a whole experience was exciting, except the first 15 days after transplanting you need to hold your nerves as you will see the transplanted place almost next to being empty and sure will be facing peak of your critics. But after the period once plant progresses with the polycorn stages, no of tillers will start multiplying every 8-12 days and soon the growth will be visible and exponential.
Summarizing this article I feel SRI principles has lots of potential to explore and it’s a boon to Paddy farmers to earn more by growing more.
Subscribe to:
Posts (Atom)